Backend Deployment
Overview
In this module, you'll deploy the BlazeNote backend application using Cloudflare Workers. As outlined in our Getting Started guide, the backend serves as the core API layer of our serverless architecture:
Backend Architecture Components:
- Runtime: Cloudflare Workers (serverless JavaScript)
- Framework: Hono.js for lightweight, fast API routing
- Database: Cloudflare D1 (SQLite-compatible) with auto-generated UUIDs
- File Storage: Cloudflare R2 (S3-compatible object storage)
- Image Processing: Cloudflare Images for optimized image uploads
- AI Integration: Cloudflare AI Workers for text summarization, translation, and chat features
This deployment establishes the foundation for your advanced note-taking application, providing API endpoints for note management, file/image uploads, AI-powered text processing, and secure data storage across Cloudflare's global edge network.
Deployment Methods
- Git-based Deployment: Automated deployment through Cloudflare Workers Builds
- CLI Deployment: Manual deployment using Wrangler CLI (this modules cover this method)
Both methods will result in your backend being available at a global edge URL: blazenote-backend.your-subdomain.workers.dev
Steps
1. Develop locally
Before deploying to production, let's ensure your backend works correctly in your local development environment.
Navigate to Backend Project
First, ensure you have the backend repository set up:
If you're not sure how to open your terminal, refer to our Prerequisites Tools guide for detailed instructions on your operating system.
cd blazenote-backend

# Switch to the starter branch (workshop environment)
git checkout starter

# Or if working from ~/projects directory
cd ~/projects/blazenote-backend
Verify Installation
Check that essential files exist:
ls -la
Required files you should see:
node_modules/directory (dependencies)package-lock.jsonfile (dependency lock)wrangler.tomlfile (Cloudflare configuration)src/directory (application source code)
Test Development Environment
Start the backend development server:
npm run dev
Expected output:
⛅️ wrangler 4.24.3
-------------------
⎔ Starting local server...
[wrangler:info] Ready on http://localhost:8787
✨ Total Upload: 0.xx KiB / gzip: 0.xx KiB
Verify API Functionality
Test the API endpoint: Open a new terminal window and test:
curl http://localhost:8787
Expected response:
Hello BlazeHack!%
Stop the development server:
Press Ctrl + C in the terminal running the dev server
2. Deploy to Cloudflare
If you prefer manual deployment or need immediate deployment control, use the Wrangler CLI method.
Prerequisites
Ensure Wrangler is authenticated:
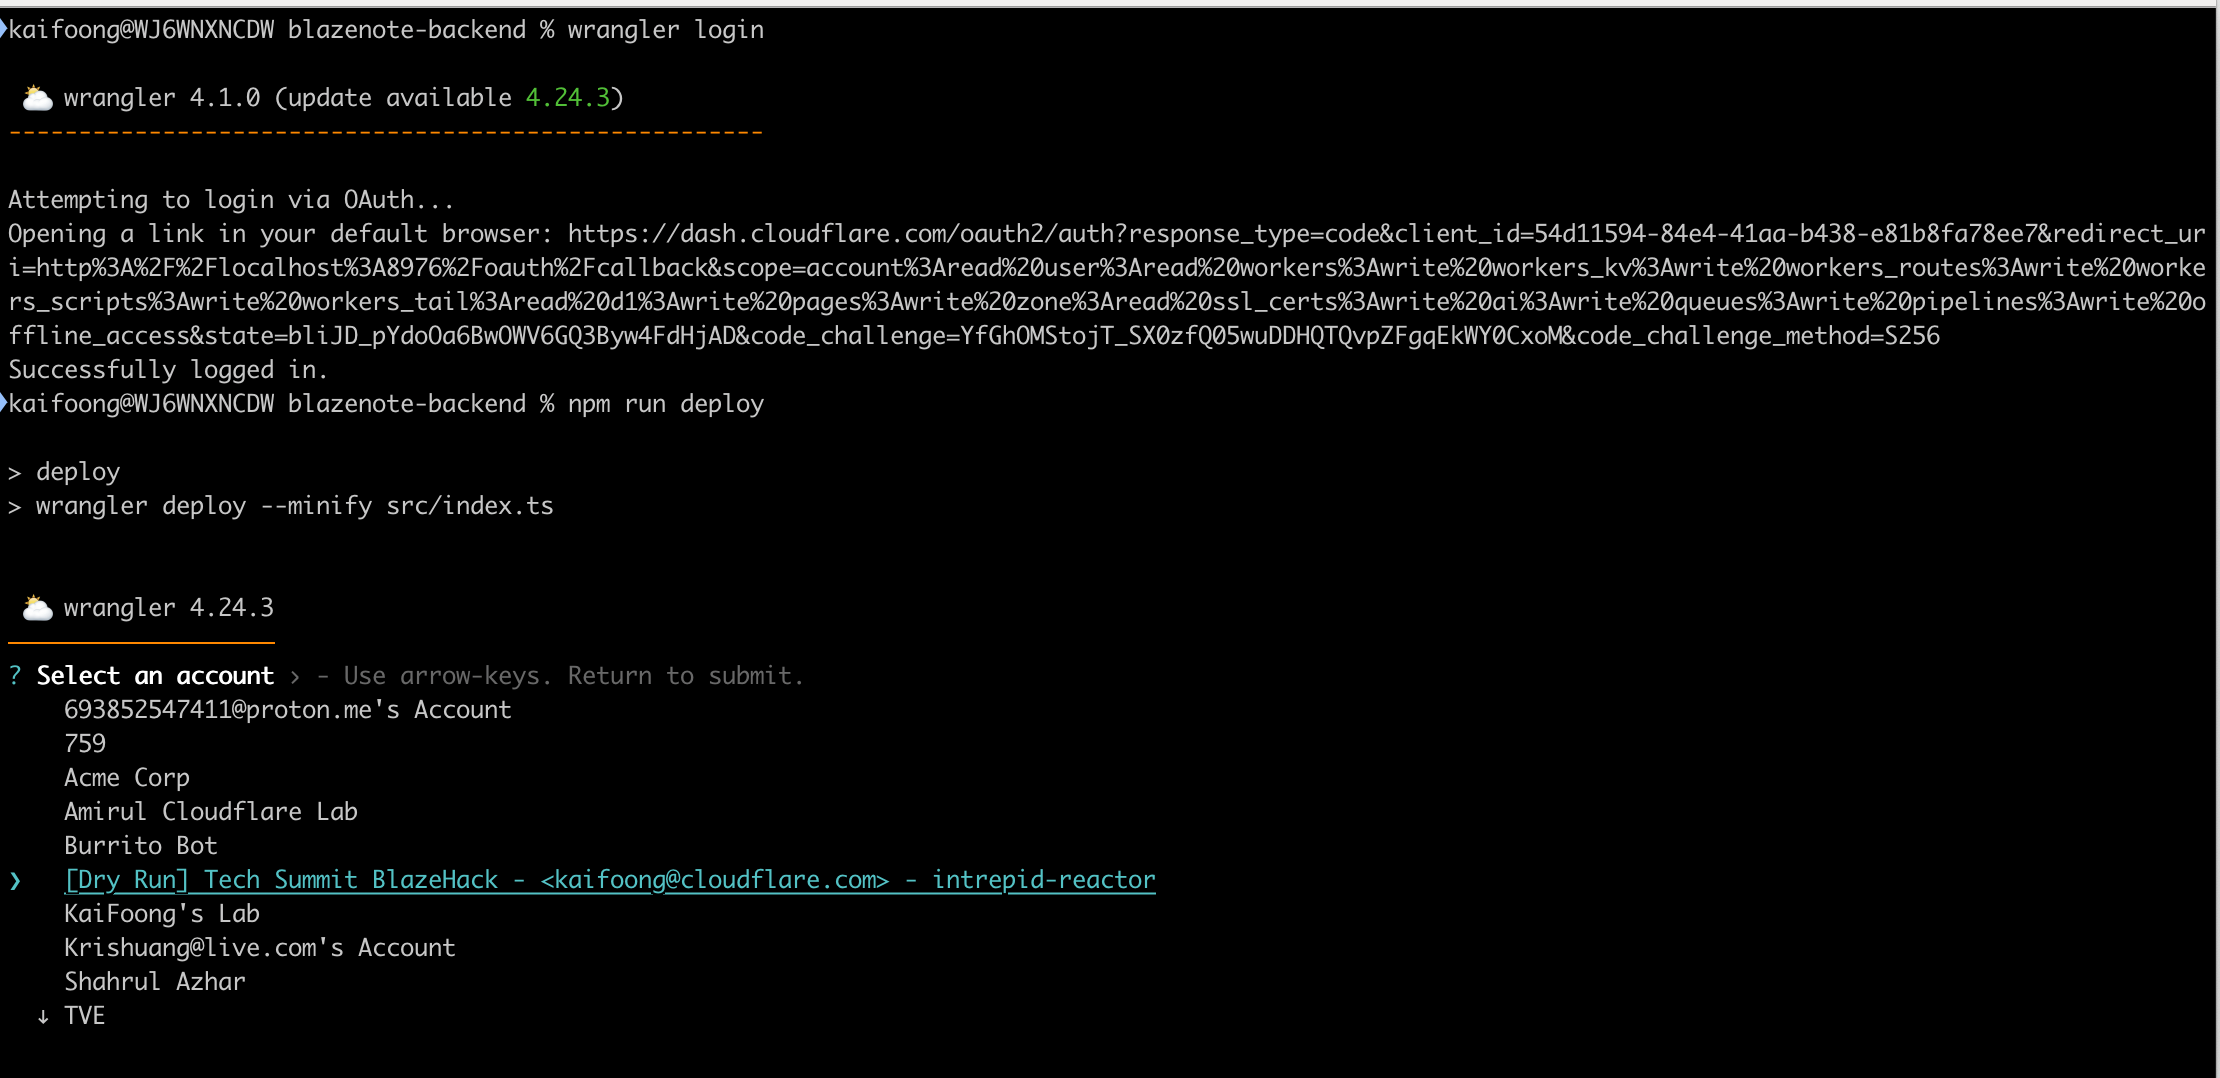
wrangler login
On first-time login, a browser window will open prompting you to authorize access. Please grant permission to allow Wrangler to connect to your Cloudflare account.
Deploy Directly
# Navigate to your backend project
cd ~/projects/blazenote-backend

# Deploy to production
npm run deploy
Expected output:
 ⛅️ wrangler 3.15.0
-------------------
✨ Successfully published your Worker to https://blazenote-backend.your-subdomain.workers.dev
Select the account you used for Blazehack
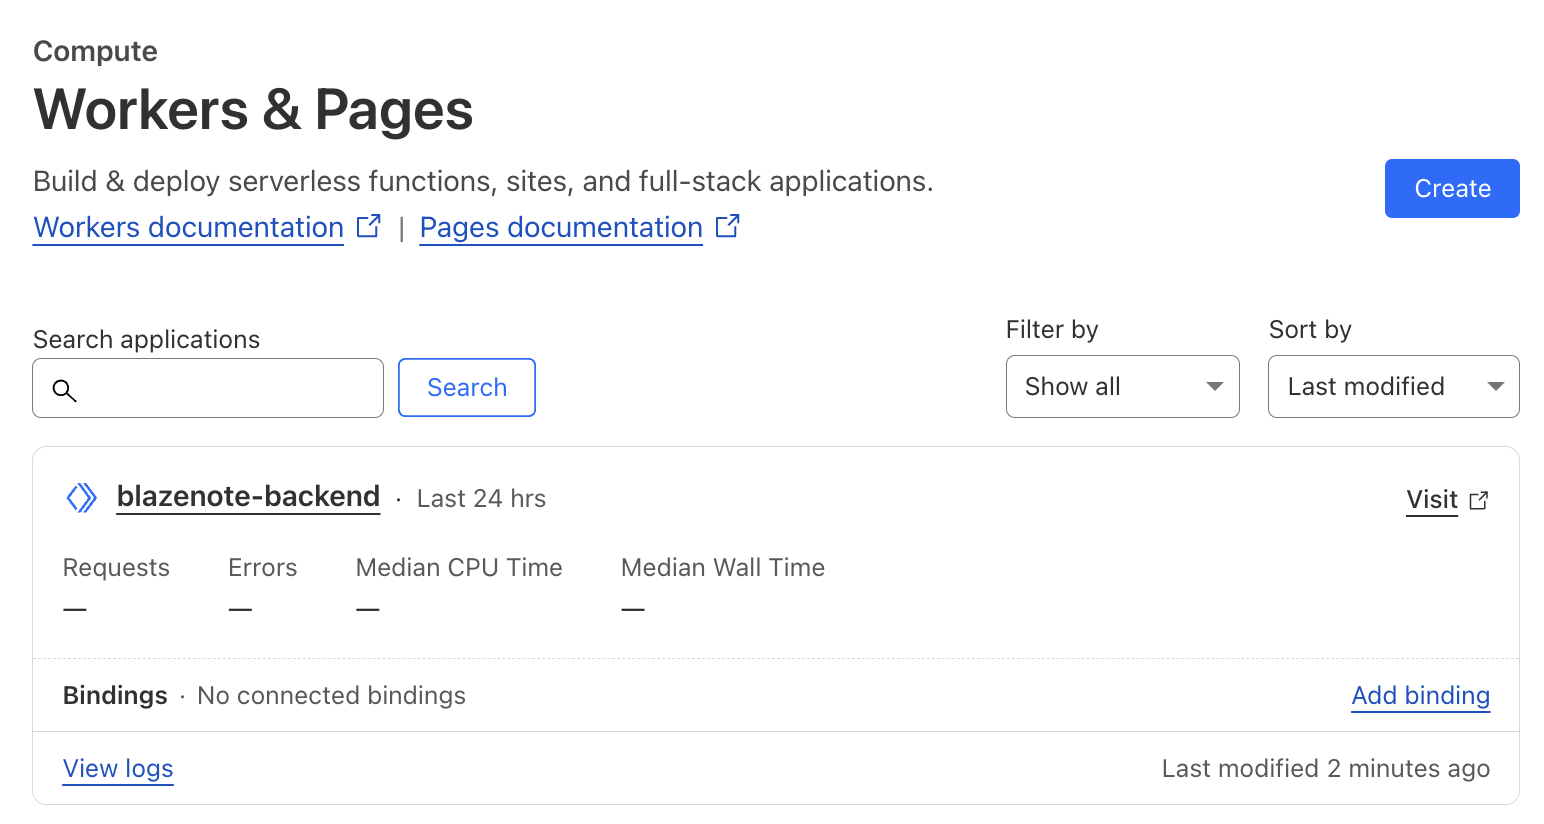
Once completed, you'll see the workers successfully deployed to Cloudflare dashboard
3. Access and Test Your Deployment
Get Your Deployment URL
For Git-based deployment:
- Dashboard: Workers & Pages →
blazenote-backend→ Deployments tab - URL format:
https://blazenote-backend.<your-pages-domain>.workers.dev
For CLI deployment:
- URL format:
https://blazenote-backend.your-subdomain.workers.dev
Test Your Live Backend
Basic connectivity test:
# Replace with your actual URL
curl https://blazenote-backend.your-subdomain.workers.dev
Expected response:
Hello BlazeHack!
DNS propagation may take approximately 15–30 minutes. If you can't access your deployment immediately, proceed with the next module and return to test later.
Environment Configuration
Wrangler Configuration
Verify your wrangler.toml configuration:
cd ~/projects/blazenote-backend
cat wrangler.toml
Expected configuration:
name = "blazenote-backend"
main = "src/index.ts"
compatibility_date = "2024-12-30"
compatibility_flags = ["nodejs_compat"]

# TODO: In-Workshop Activities. Uncomment the code below:

# [[d1_databases]]
# binding = "DB"
# database_name = "blazenote"
# database_id = "<your-database-id>"
# migrations_dir = "./migrations"

# [[r2_buckets]]
# binding = "R2_BUCKET"
# bucket_name = "blazenote"
# preview_bucket_name = "dev-blazenote"

# Enable observability logging
[observability.logs]
enabled = true
Environment Variables
Required environment variables (we will add this later in the next module):
DB: D1 database binding (configured in wrangler.toml)R2_BUCKET: R2 storage binding (configured in wrangler.toml)R2_ACCESS_KEY: R2 access key for S3-compatible operations (optional). We will this up in Module 3.R2_SECRET_KEY: R2 secret key for S3-compatible operations (optional). We will this up in Module 3.R2_ENDPOINT: R2 endpoint URL for S3-compatible operations (optional). We will this up in Module 3.
CORS Configuration
If you haven't done your frontend, you may now proceed to frontend-deployment
Update Allowed Origins
Important: Before your frontend can communicate with the backend, you need to update the CORS settings to include your frontend domain.
Edit the CORS Configuration
Open src/index.ts and update the allowedOrigins set:
// Define allowed origins
const allowedOrigins = new Set([
  "http://localhost:5173",           # Local development
  "https://<slug>.sxplab.com",     # Your deployed frontend domain
  "https://blazenote-frontend.your-subdomain.workers.dev",     # Your deployed frontend workers.dev domain
]);
Deploy the Changes
After updating the CORS settings, redeploy your backend:
npm run deploy
Frontend-Backend Communication: Your frontend will not be able to make API calls to the backend until the CORS settings include your frontend domain. This is a common source of connection issues.
Troubleshooting Guide
Common Build Issues
❌ "Module not found" errors
# Clear node_modules and reinstall
rm -rf node_modules package-lock.json
npm install
❌ TypeScript compilation errors
# Check TypeScript configuration
npx tsc --noEmit
# Fix type errors in src/ files
❌ Wrangler authentication issues
# Re-authenticate with Cloudflare
wrangler auth logout
wrangler auth login
Common Deployment Issues
❌ "Worker exceeded CPU time limit"
- Check for infinite loops in your code
- Optimize database queries
- Review middleware performance
❌ "Binding not found" errors
- Verify
wrangler.tomlbindings configuration - Check D1 database ID is correct
- Ensure R2 bucket exists and is accessible
❌ CORS errors from frontend
- Symptoms: Browser console shows "blocked by CORS policy" errors
- Solution: Update the
allowedOriginsinsrc/index.tsto include your frontend domain - See: CORS Configuration section for detailed instructions
// Common CORS error fix - update allowedOrigins in src/index.ts
const allowedOrigins = new Set([
  "http://localhost:5173",
  "https://your-frontend-domain.workers.dev",  # Add your actual frontend URL
]);
References
- Cloudflare Workers Documentation
- Wrangler CLI Reference
- Hono.js Documentation
- Cloudflare D1 Database
- Cloudflare R2 Storage
- TypeScript Best Practices
<SLUG>.sxplab.com. You can also find your domain/zone name in the Cloudflare dashboard.